The Cricut Explore Air 2 is one of the most common Cricut machines, which works for both beginners as well as advanced crafters. If you’re a hobbyist, Explore Air 2 will suit you best. This innovative machine can do multiple things like cutting, scoring, and writing with different materials to prepare your projects. The Design Space software will help you select your project from the front list of ready-to-create projects.

This blog will help you understand how to use Cricut Explore Air 2. And when you know that, it becomes easier to use this machine to create your favorite stuff. We’ll cover everything you must know about its use, from the materials required to the features you need to use. So, take notes of everything we mentioned here. You can use this Cricut machine from anywhere with your device and take a test cut.
What’s Inside the Cricut Explore Air 2 Box?
When you get a new Explore Air 2 machine, you’ll receive various Cricut accessories. Here is the list of those accessories.
- Cutting mat (3 pack)
- Standard tools set
- Deep cut blade
- Explore multi-pen set- Gold
- Explore multi-point pens- Black
- Portable trimmer tool
- Scoring stylus
- Window cling material
- Vinyl sampler, Brights
- Printable iron-on, Blue Glitter
- Chalkboard vinyl
- Faux leather pebbled patina
- Metallic poster board sampler
- Dry erase vinyl
Standard Cricut Explore Air 2 materials:
- Brand new Cricut Explore Air 2 machine
- USB and power cord
- Pens
- Cardstock
- German carbide premium blade
- 12 X 12 standard grip cutting mat
All these materials you’re going to receive when you buy a brand new Explore Air 2.
How to Use Cricut Explore Air 2?
Well, at first, it may seem a little complex and tricky, but as you start applying the steps, you’ll get to know how easy it is to make your first test project with the Explore Air 2 machine.
First, you have to set up your machine, and then you can start following our instructions to get your first test cut. We know that beginners may find it a little difficult to perform a test cut. Therefore, we’ll keep this tutorial quite simple and easy for them. Go ahead with the following steps.
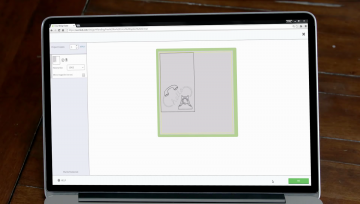
- During the machine setup, you’ll see a message as New machine setup, and a design will appear on your screen; if not, you must visit design.cricut.com, tap the menu icon at the left corner, and click New machine setup.
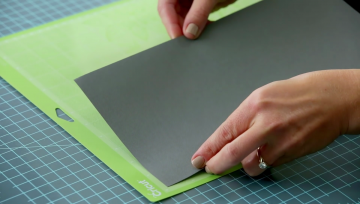
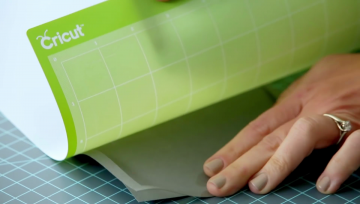
- Now, gather all the accessories you received with your machine, take the Cricut cutting mat, and take off the protective film.
- Adjust the gray cardstock on your cutting mat and keep the shinier look facing up and vertically on the mat. Make sure to place it below the Cricut logo.
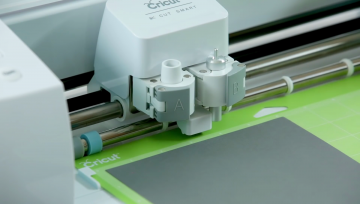
- Now, insert it into the Cricut machine. Ensure to load the mat in line with the mat guides.
- Then, press the mat a little against the rollers and push the Load button available on the top right of your Cricut machine. The Load button is a sign of double arrows.
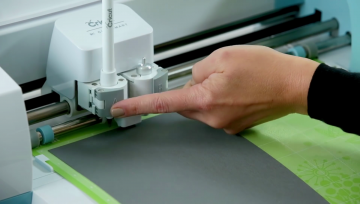
- After that, open the accessory clamp to place the silver paper. Next, take off the pen cap and put it into the housing until the arrow on your pen disappears.
- Move to the preview screen to confirm your design and click Go.
- Next, set the dial on your machine to cardstock.
- Then, verify that the C button on the Cricut machine is flashing. Push that button to cut your design.
- Take off your mat once your project is finished. Also, take out the pen.
- Now, put your cutting mat on a surface with your face down and curl its edges to peel off the material from it; by curling your mat, you’ll easily do it.
- After that, fold your card and then fold the blue paper and place it inside the gray card.
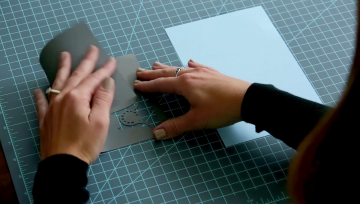
- Now, apply some glue to sit them in place.
- Finally, your first project is ready.
These are the steps to use your Cricut Explore Air 2 machine. Our guide on how to use a Cricut Explore Air 2 machine is finished now, and you can start making your first project.
Conclusion
You have learned how to use Cricut Explore Air 2. This machine is very innovative, and you can prepare different crafts with it. Plus, it’s not limited to writing or drawing, but it can do certain other things too. To set up this machine, you need a stable internet connection, Design Space, and Cricut accessories. When you have everything ready, you’re all set to use your Explore Air 2 machine.
You also have the flexibility to use the Design Space. Therefore, you can use the premade designs from the Design Space or upload your own designs. As this machine is cloud-based, you can easily make your projects from anywhere, like from your computer, laptop, tablet, or smartphone. So, overall, you are good to go to use this incredible machine.
Visit: design.cricut.com/setup
